
Made in America
Get Connected With



Choosing a Warehouse Racking System is a structural decision, not merely a storage purchase. The right choice affects safety, access, labor time, and future expansion.
The 2024 MHI Annual Industry Report identifies supply-chain technology investment as a continuing priority for many companies. Its findings also show growing interest in automation, data visibility, and adaptable operations. These trends matter because a rack layout must support today’s inventory without blocking tomorrow’s changes. Meanwhile, OSHA guidance emphasizes regular inspections, load awareness, employee training, and immediate action after damage. A bent upright is not a cosmetic issue.
As warehouse safety consultant Russell Ellis puts it, “Racking is a structure, not a piece of furniture.” That sentence deserves attention. It challenges a common shortcut: choosing the cheapest frame that fits the available floor space. A warehouse may look organized while storing incompatible loads, restricting sprinkler clearance, or creating unsafe forklift turns.
Details matter.
Measure beam levels, aisle widths, pallet dimensions, floor conditions, and loading patterns. Question every assumption. Some recommendations may fail when product sizes change, which is an uncomfortable but realistic limitation. The following ten tips connect engineering judgment with daily warehouse experience. They consider capacity, configuration, protection, compliance, inspection, and long-term flexibility. Guidance from the Rack Manufacturers Institute and ANSI MH16.1 should also inform the final design. A qualified professional should verify the system before installation and use.
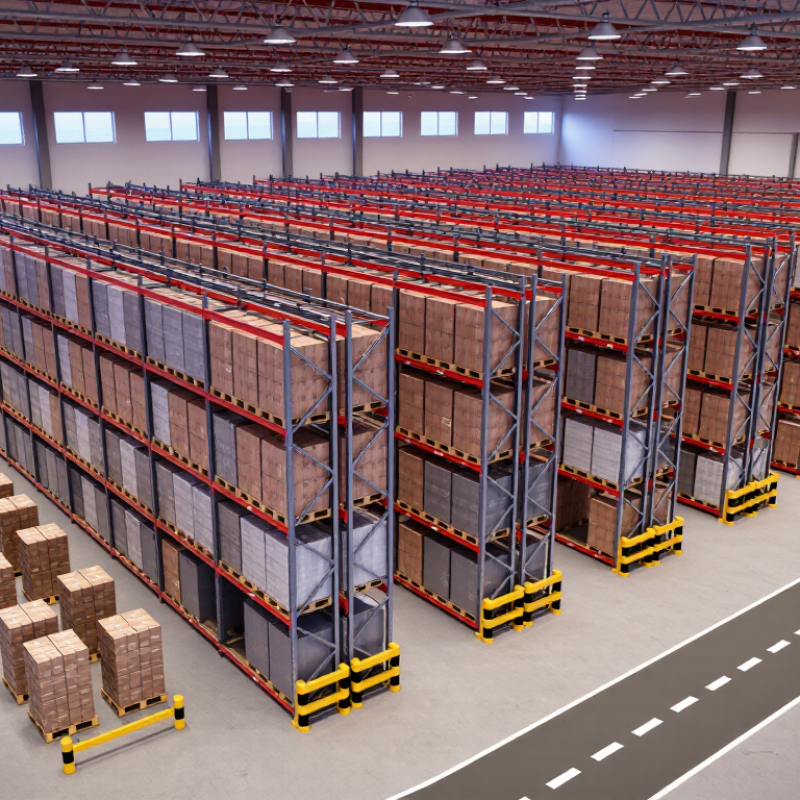
10 Tips for Choosing a Warehouse Racking System
Define Load, SKU, and Throughput Needs from Peak-Volume Data
Peak-volume data should guide your racking decision. Average volume can hide serious capacity problems. Review the busiest weeks, not only annual averages. Record pallet weights, dimensions, stacking limits, and handling equipment. Tip 1: Measure real load weight. Tip 2: Include packaging and damaged pallets. Tip 3: Check clear height and floor strength. Tip 4: Allow room for safe beam deflection. I once saw a plan based on standard pallets that failed after product packaging changed. Small errors become expensive quickly.
Count active SKUs during peak periods. Tip 5: Separate fast, medium, and slow movers. Tip 6: Record each SKU’s pallet quantity and replenishment frequency. Tip 7: Track seasonal products separately. Tip 8: Identify mixed-SKU pallets before selecting storage depth. A high SKU count may require more selectivity, while repetitive inventory may support denser storage. Do not assume maximum density is best. It can slow picking and create hidden labor costs.
Throughput needs deserve equal attention. Tip 9: Count inbound and outbound pallet movements hourly during the busiest shift. Tip 10: Compare those movements with aisle capacity, dock schedules, and lift-truck travel time. Leave practical space for inspections and maintenance. Recheck the model with warehouse operators. Their experience often reveals blocked sightlines or awkward turns. The first design may be wrong. That is useful information, not failure. Reliable choices come from measured peaks, documented assumptions, and scheduled reviews when demand changes.
Define load, SKU, and throughput needs from peak-volume data. The chart shows representative peak-day pallet movements by warehouse operating area, helping teams size rack capacity and handling equipment for the busiest periods rather than average demand.
Peak-day throughput is the number of pallet movements handled during the highest-volume operating day. Combine this measure with pallet weight, SKU velocity, storage density, and required selectivity before selecting a selective, double-deep, drive-in, or specialized racking layout.
Verify rack capacity under ANSI MH16.1 and OSHA 1910.176 before comparing prices. ANSI MH16.1 provides engineering guidance for industrial steel storage racks. It addresses design loads, structural performance, and component requirements. OSHA 1910.176 requires stored materials to remain secure and organized. It also requires clear aisles and safe handling conditions. OSHA does not replace a rack capacity calculation.
Check every beam, upright, connector, anchor, and base plate. Capacity depends on the entire configuration. Beam length, vertical spacing, pallet weight, and load distribution all matter. A rack rated for one layout may fail under another. That detail is often missed. Ask for engineering calculations and documentation from a qualified professional. Confirm that posted load signs match the installed configuration. Never rely only on a sales sheet or a faded label.
Walk through the aisles with the actual pallets. Look for bent uprights, loose anchors, missing pins, and uneven floors. Measure forklift clearance around each bay. Inspect the slab before loading heavily. A strong rack cannot correct a weak foundation. Keep heavier pallets on lower levels when the design permits it. Review capacity after changing beams, decking, pallet sizes, or storage heights. Workers should report impacts immediately. In practice, teams sometimes postpone inspections during busy shifts. That habit needs correction, even when no damage is visible. Recheck the design whenever warehouse conditions change.
Storage density changes sharply across four core racking systems. Selective pallet racking usually stores one pallet deep per location. It offers about 90–95% direct pallet access, but uses more aisles and floor space. Double-deep racking can raise pallet density by roughly 20–40%, according to common warehouse planning benchmarks. However, it needs reach equipment and reduces immediate access to rear pallets.
Drive-in racking may use 60–80% of available floor space for storage. It suits stable products with few stock-keeping units. Push-back racking often delivers 30–50% more storage capacity than selective layouts. It also supports faster loading and retrieval than drive-in systems. These ranges align with guidance discussed in WERC benchmarking materials and Material Handling Institute warehouse reports. Actual results depend on beam height, pallet size, aisle width, and fire-safety clearances. Numbers can look impressive. Site measurements can disagree.
Tip: Count usable pallet positions, not just floor coverage. A narrow aisle may increase capacity, but it can slow every forklift movement.
Tip: Test inventory rotation before choosing high-density storage. LIFO-friendly systems may create hidden aging stock. Leave room for damaged pallets, inspection space, and future SKU growth.
A 2024 warehouse operations survey from WERC highlights labor efficiency and space utilization as linked performance concerns. That relationship is easy to underestimate. A layout that fits more pallets may still cost more per retrieval. Review one week of real travel paths before approving the final design.
10 Tips for Choosing a Warehouse Racking System
Set Aisle Widths, Clearances, and 80–85% Utilization Targets
Tips for planning aisle widths: measure the actual turning path of your busiest equipment, not just its published dimensions. Add room for pallet overhang, uneven loads, and occasional pedestrian movement. In one warehouse review, a narrow aisle looked efficient on paper but caused repeated reversing. That estimate was too optimistic. Mark the proposed aisle with floor tape, then test it during normal operating hours.
Tips for setting clearances: keep practical space above, below, and beside every load. Check beam levels against pallet height, packaging variation, sprinkler requirements, lighting, and building obstructions. Leave enough room for safe placement without scraping neighboring pallets. A few extra centimeters can prevent damaged goods and awkward handling. Confirm measurements at the highest storage level.
Tips for utilization: target 80–85% occupancy rather than filling every location. This range supports access, replenishment, seasonal peaks, and inventory changes. A warehouse packed to 95% may appear productive, yet inaccessible stock reduces real capacity. Track occupied locations weekly, including blocked or unusable spaces. Do not count empty air as available capacity. Review the layout after several weeks of real operations, because travel patterns often differ from the original plan. Safety checks should follow applicable local requirements and competent professional advice.
| No. | Planning Dimension | Practical Target or Reference Range | Why It Matters | Selection Guidance |
|---|---|---|---|---|
| 1 | Define the load profile Unit load, pallet size, weight, and height | Record the largest and heaviest regular load, plus seasonal or abnormal loads. Include pallet dimensions and load overhang. | Rack beams, uprights, decking, and handling equipment must be rated for the actual load condition, not only the average load. | Choose a system with documented capacity at the required beam spacing and storage height. Do not exceed the posted rack rating. |
| 2 | Match aisle width to the truck Clear operating aisle | Typical planning ranges: pedestrian aisles 3–4 ft (0.9–1.2 m); reach-truck aisles about 9–10 ft (2.7–3.0 m); counterbalance-truck aisles about 12–13 ft (3.7–4.0 m). | Aisles that are too narrow increase turning difficulty, product damage, and collision risk. | Use the equipment manufacturer’s specified right-angle stacking aisle, then validate it with the actual pallet, load overhang, turning path, and floor conditions. |
| 3 | Allow rack and pallet clearances Horizontal and vertical gaps | Provide at least 3 in (75 mm) of practical side clearance per pallet position where operating conditions require it; increase the allowance for unstable loads or frequent handling. | Clearance helps prevent pallet contact with uprights, adjacent loads, and beams during placement and retrieval. | Confirm the final gap using pallet tolerances, load overhang, rack deflection, truck visibility, and local safety requirements. |
| 4 | Protect sprinkler and building clearances Top-of-storage separation | Maintain a minimum 18 in (450 mm) vertical clearance below many overhead sprinkler arrangements; some systems and storage configurations require more. | Insufficient clearance can obstruct sprinkler discharge and create a fire-code violation. | Verify the clearance with the applicable fire code, sprinkler design, commodity classification, roof height, and storage arrangement before fixing rack height. |
| 5 | Set a realistic utilization target Space occupancy versus usable capacity | Target approximately 80–85% utilization of usable pallet positions or cubic capacity, rather than planning for 100% occupancy. | The reserve supports peak inventory, slotting changes, damaged locations, access requirements, and operational flexibility. | Measure utilization separately by pallet positions, floor area, and cubic volume. Define the calculation before comparing design options. |
| 6 | Use vertical space carefully Clear height and lift capability | Keep the highest load below the planned rack elevation and preserve required sprinkler, roof, lighting, and structural clearances. | Higher storage can increase capacity, but it also raises equipment requirements, inspection needs, and load-handling risk. | Confirm building clear height, truck lift height, mast clearance, slab capacity, lighting, and seismic requirements before adding rack levels. |
| 7 | Separate traffic and pedestrian paths Safety aisle and crossing design | Provide marked pedestrian walkways, protected crossings, and clear sightlines wherever people and powered industrial trucks share space. | Physical separation reduces interaction between pedestrians, trucks, and stored loads. | Use barriers, guardrails, mirrors, signs, floor markings, speed controls, and one-way routes where the risk assessment supports them. |
| 8 | Plan for SKU velocity and access Fast, medium, and slow movers | Place high-frequency items in the most accessible locations, typically between knee and shoulder height where manual picking is used. | Shorter travel paths and easier access can improve throughput and reduce unnecessary handling. | Compare selective, double-deep, drive-in, flow, or narrow-aisle layouts based on selectivity, inventory rotation, and required access frequency. |
| 9 | Check floor and structural conditions Slab, anchoring, and building constraints | Verify concrete slab thickness, strength, levelness, joint locations, anchor requirements, column spacing, doors, docks, and emergency exits. | The rack layout must transfer loads safely without blocking critical building services or egress routes. | Obtain a site survey and have the final design reviewed by a qualified rack or structural professional where required. |
| 10 | Measure performance after installation Capacity, safety, and operating results | Track utilization, pallet touches, travel distance, picking rate, damage incidents, near misses, and rack inspection findings. | A layout that looks efficient on paper may not perform well under actual demand, replenishment, and traffic conditions. | Review results regularly and adjust slotting, aisle controls, load signage, and storage rules without exceeding the engineered rack capacity. |
10 Tips for Choosing a Warehouse Racking System
Seismic protection should be planned before the first upright is installed. Review local seismic design requirements with a qualified structural engineer. ASCE/SEI 7-22 provides the load criteria used for seismic design. Anchorage, bracing, beam connections, and slab strength must work together. Tip 1: Request stamped calculations. Tip 2: Keep clearances around sprinklers, exits, and building columns. The U.S. Bureau of Labor Statistics reported 4.8 recordable injury and illness cases per 100 warehouse workers in 2022. Rack damage is not only a structural concern.
Inspections must reflect real operating conditions. Check uprights, beams, anchors, protectors, decking, and load labels. Look for dents, twisted frames, missing pins, and overloaded levels. Racking Manufacturers Institute guidance supports regular user inspections and qualified technical reviews. Tip 3: Complete a visual check every shift. Tip 4: Tag damaged components immediately. Tip 5: Record photos, locations, and corrective actions. Small defects become expensive failures. I have seen teams document problems carefully, yet delay repairs. That weakness deserves honest attention.
Expansion capacity should be designed, not guessed. Reserve floor space, vertical clearance, compatible components, and electrical capacity for future growth. Tip 6: Model projected pallet positions for three to five years. Tip 7: Avoid mixing unverified components. Tip 8: Leave access for future aisles and equipment. Tip 9: Confirm the slab can support added loads. Tip 10: Recheck seismic calculations after major changes. A flexible design may cost more today. It can prevent forced reconstruction later.