How to Choose the Right Drain Pipe for Your Project?
Choosing the right drain pipe is not a minor specification. It affects how water moves beneath a driveway, around a foundation, or through a stormwater system. A pipe that is too small can leave puddles after heavy rain. One that cannot withstand soil pressure may deform underground. The right choice depends on flow, installation depth, soil conditions, expected loads, and the system’s purpose.
The scale of the challenge is substantial. The U.S. Environmental Protection Agency’s 2022 Clean Watersheds Needs Survey estimated $630.1 billion in wastewater and stormwater infrastructure needs over 20 years. The American Society of Civil Engineers’ 2021 Report Card assigned wastewater infrastructure a D+ and stormwater infrastructure a D. These reports describe broad infrastructure needs, not a single pipe market. Still, they show why careful planning matters. Small details count.
Stormwater researcher Dr. Robert Pitt of the University of Alabama has studied runoff management extensively. A practical paraphrase of his work is: “Plan drainage around the site’s runoff, pollutants, and conditions—not pipe price alone.” Treat that as a design principle, not a verbatim quotation. When comparing PVC, HDPE, concrete, or other options, check manufacturer specifications and applicable engineering requirements. Consider joint performance, abrasion, corrosion, installation methods, and maintenance access. A material may look ideal on paper, yet prove difficult to install in rocky soil. That deserves a second look. This guide examines how to match pipe material, diameter, strength, and layout to the project, while identifying trade-offs worth discussing with a qualified drainage professional.
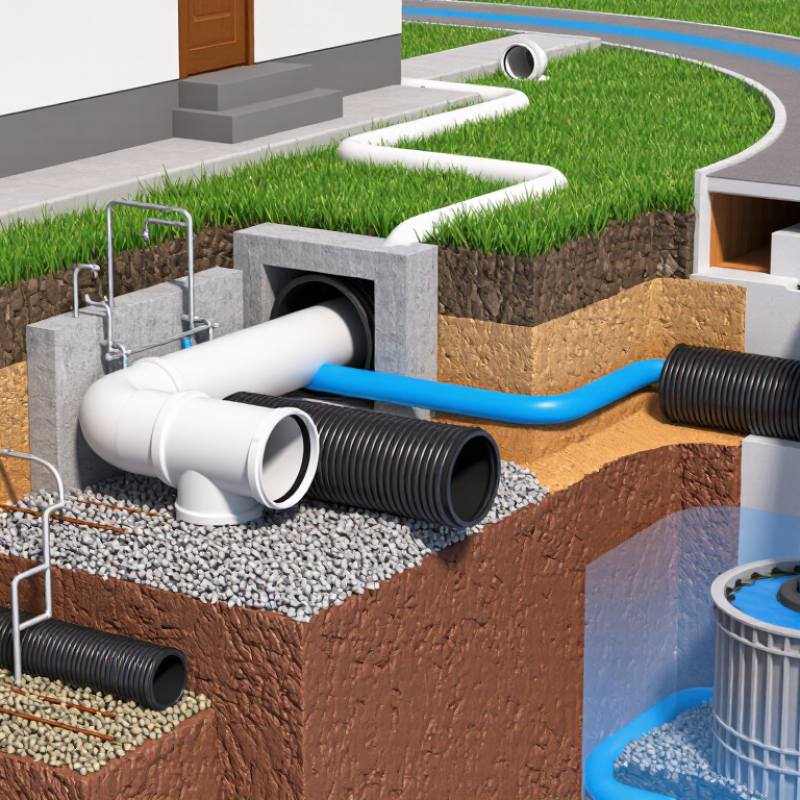
Identify the Drainage Requirements of Your Project
Before selecting a drain pipe, identify where the water comes from and how quickly it arrives. A roof, patio, foundation, and washing area can produce very different flows. Estimate the contributing surface area and consider intense rainfall, not just an average shower. Water moves downhill. Note where it currently pools, enters the soil, or threatens structures.
Then inspect the route. Measure available slope and check for buried obstacles, nearby utilities, and the pipe’s required depth. Soil matters: sandy ground may drain readily, while dense clay can keep water near the surface. Consider expected loads too, especially beneath driveways or walkways. A pipe sized only by guesswork may overflow or clog. Check capacity against local design guidance, and get qualified help when flow calculations or site conditions are uncertain.
Map each inlet and the intended outlet before buying materials. A simple sketch with elevations can reveal a flat section where water may stall. Include leaves, grit, or other debris in your assessment; screens and cleanouts may be needed, but they also require maintenance. Small details matter. An existing puddle can be a useful clue, though it may not show the full problem during dry weather. Walk the site during rain if possible, and record where water travels.
Compare Drain Pipe Materials and Their Properties
PVC is lightweight, smooth inside, and resistant to many common soil and wastewater conditions. Its low weight can simplify handling, but check the product’s stiffness class against burial depth, traffic loads, and bedding quality. HDPE bends around gentle curves and uses fused joints, which can reduce leak paths. It expands more with temperature, though, and installation quality matters. Small details count.
Concrete pipe offers high structural capacity and is often used for large stormwater flows, but its weight requires suitable lifting equipment. In corrosive wastewater environments, concrete may need added protection. The U.S. EPA’s 2022 Clean Watersheds Needs Survey estimated $630.1 billion in wastewater and stormwater infrastructure needs over 20 years. That figure is not a material comparison; it does show why service life and maintenance deserve attention. Compare expected flow, soil chemistry, groundwater, cover depth, and joint design before choosing. I would also verify local specifications: a pipe that performs well in one soil can disappoint in another. Slightly inconvenient, but worth checking.
Choose the Appropriate Pipe Diameter and Slope
Choosing a drain pipe diameter starts with the water it must carry. Count connected fixtures, estimate peak flow, and note whether the pipe serves one branch or several. A roof drain also depends on the area and rainfall design conditions. A pipe that is too small can back up during heavy use. A larger pipe is not automatically better; with low flow, some systems may not move solids effectively. Small details matter.
Slope is the vertical drop over a horizontal distance. For example, a 1% slope drops 10 millimeters per meter, while 2% drops 20 millimeters. These figures explain the calculation, not a universal prescription. Required slopes vary with pipe diameter, material, and local plumbing guidance. Check the project requirements before choosing a value.
During installation, use a level or laser to check the fall along the full run. A sag between supports can hold water, even when both ends look correctly aligned. Too much slope may also let water run ahead of solids in some gravity-drain applications. I would not rely on a quick visual check alone; it is easy to miss a slight dip behind a wall or beneath a floor. Recheck the layout, support spacing, and connection elevations before the pipe is concealed.
How to Choose the Right Drain Pipe for Your Project? — Choose the Appropriate Pipe Diameter and Slope
Use this guide as a starting point for gravity-flow sanitary drainage. Pipe diameter must be selected for the expected flow, connected fixtures, pipe layout, and applicable local plumbing code.
| Nominal Pipe Diameter |
Approximate Metric Size |
Typical Residential Use |
Example Minimum Slope |
Slope in Metric Units |
| 1½ in |
DN 40 |
Small fixture branches, such as some lavatory drains |
¼ in per ft |
20.8 mm per m (2.08%) |
| 2 in |
DN 50 |
Commonly used for certain sink, shower, or bathtub branches, subject to code sizing |
¼ in per ft |
20.8 mm per m (2.08%) |
| 2½ in |
DN 65 |
Branch drainage where required by fixture load and local code |
¼ in per ft |
20.8 mm per m (2.08%) |
| 3 in |
DN 80 |
Some toilet branches and smaller building drains, where permitted by code |
⅛ in per ft |
10.4 mm per m (1.04%) |
| 4 in |
DN 100 |
Common residential building drain or building sewer size; confirm required capacity |
⅛ in per ft |
10.4 mm per m (1.04%) |
| 6 in |
DN 150 |
Larger building drains or site drainage systems designed for higher flows |
⅛ in per ft |
10.4 mm per m (1.04%) |
| 8 in and larger |
DN 200 and larger |
Large drainage systems; size and grade should be hydraulically designed |
1⁄16 in per ft |
5.2 mm per m (0.52%) |
Important: The slope examples above reflect minimum grades listed for horizontal drainage piping in the International Plumbing Code (IPC); local adoption and amendments may differ. They are not a substitute for pipe sizing calculations. Stormwater drains, pressure systems, and site sewers may require different design methods. Check local code and avoid abrupt changes in grade.
Evaluate Site Conditions, Load, and Local Requirements
Begin with the ground around the pipe. Check soil type, groundwater, slope, and where runoff can safely discharge. A clay trench may hold water, while loose fill can settle and leave joints misaligned. NOAA Atlas 14 provides location-based precipitation-frequency estimates; use the applicable values, not a rainfall figure borrowed from another town. That difference matters. The Federal Highway Administration’s HEC-22 drainage manual also emphasizes matching inlet and pipe capacity to the design storm and drainage area.
Then assess burial depth, traffic, and construction loads. A pipe beneath a driveway faces different demands from one beneath a planted swale. Confirm the manufacturer’s published stiffness and installation requirements, and specify suitable bedding and compaction. These details are easy to understate on a plan. EPA’s 2022 Clean Watersheds Needs Survey estimated $115.3 billion in nationwide stormwater infrastructure needs, showing how much local drainage work remains. It does not set a design for your property, though. Check municipal rules for approved materials, minimum cover, discharge points, and permits before ordering. I would leave room for uncertainty: old utility maps and changing soil conditions can make a neat drawing look more certain than the site really is.
Select Compatible Fittings and Check Installation Needs
Choosing a drain pipe is only part of the job; fittings must match its size, material, and joining method. Check the pipe’s nominal size and the fitting manufacturer’s stated dimensions. Pipes with similar labels may not have identical outside diameters. A mismatch can cause a loose joint or force an unreliable workaround. Small details matter.
Match elbows, tees, reducers, and adapters to the system’s intended use. A fitting designed for one material may not bond securely to another. For solvent-welded joints, use compatible materials and follow the product instructions, including preparation and curing time. For gasketed connections, inspect the seal and make sure it sits evenly. I have seen careful pipe layouts become troublesome because one small adapter was overlooked.
Consider the installation space before buying. Measure clearance around walls, joists, and existing services; a fitting that works on paper may be difficult to assemble in a cramped corner. Plan for the required slope, support points, and access to cleanouts. If the drain connects to a pump or appliance, check its specified outlet size and flow requirements. I would recheck measurements before cutting, especially where several fittings meet. Confirm local plumbing requirements when the project affects a building’s drainage system.